When ever this happens everyone will Google it and look for a solution to disable this feature. I did the same thing but stumbled upon a new way of running those apps without changing the default security setting. Thanks to http://www.intego.com/mac-security-blog/new-security-features-in-os-x-mountain-lion/ You just need to hold "Control" key, right click on the app and select "Open. This time you will get a slightly different warning. Select Open and you need to enter Admin credentials to make it effective. That's it. Now you can open SQL Developer and it won't bother you again with that security message.
Dear Readers,
Views expressed in this blog are my personal opinion and not necessary reflect the Company I work/worked for.
Occasionally I invent something and most of the time I ask Google to help me solve my problems.
I enjoy reading tech articles when I find some time/during break.
Thanks for visiting my blog and Enjoy Reading!!
Monday, February 25, 2013
Mac Security-Running selected external applications
Mac Mountain lion has a new security feature(actually lot of features) which prevents running apps downloaded outside of Mac app store. If you try to run those apps you will get a warning something like this. For example, I have downloaded SQL Developer from Oracle.
Tuesday, January 15, 2013
Why Windows 7 is better than Windows 8
In other words, why Fidelity Windows 7 gadget is better than Windows 8 finance app with Live tiles.
Dow Jones index is shown in red which kind of indicates it's down in Fidelity app.
What's the point in having live tile, if it can't paint the picture using proper color. Why is it in green when the index is down in Windows 8.
Dow Jones index is shown in red which kind of indicates it's down in Fidelity app.
Thursday, January 10, 2013
Mapping multiple schemas to Apex Workspace
Unfortunately Apex Admin application doesn't let you map more than one schema to the workspace. However I had a requirement to map 500 schema's to one single workspace (For the creation of training application for 500 Users). APEX_INSTANCE_ADMIN package came in handy and I did it using PL SQL.
Here is how you do it.
SQL> APEX_INSTANCE_ADMIN.ADD_SCHEMA(
p_workspace => 'MY_WORKSPACE', p_schema => 'MY_SCHEMA');
PS: You can use the same package REMOVE_SCHEMA to remove the mapping as well. Also SYS & SYSTEM schema's cannot be mapped using the same due to security restriction.
Reference to Oracle documentation: http://docs.oracle.com/cd/E37097_01/doc/doc.42/e35127/apex_instance.htm
Here is how you do it.
SQL> APEX_INSTANCE_ADMIN.ADD_SCHEMA(
p_workspace => 'MY_WORKSPACE', p_schema => 'MY_SCHEMA');
PS: You can use the same package REMOVE_SCHEMA to remove the mapping as well. Also SYS & SYSTEM schema's cannot be mapped using the same due to security restriction.
Reference to Oracle documentation: http://docs.oracle.com/cd/E37097_01/doc/doc.42/e35127/apex_instance.htm
Thursday, September 20, 2012
Get most out of your Wireless Router
I have Linksys E2500 (Cisco) router at home and Optimum is my ISP. It's a dual band router with Wireless N support and can server upto 300Mbps. I just left my Wireless Router settings to default other than just protecting my SSID. I don't abuse my ISP by downloading Gigs of data or by hosting bit torrent. Still I hardly get 10-15 Mbps download speed with my ISP.
I do have some basic understanding about Networking but never paid attention to it on my Router. I was just Googling to find ways to improve performance and I can't believe how effective you can make your router with some simple tweaks. I thought it is worth sharing and listed some of the tweaks I did on my Router. Again these are all specific to my Router Linksys E2500, however you can apply the same concepts on your Router.
Below is screenshot f my Wireless Router Setting.
#1: Switch to "Manual" configuration mode from Basic Wireless Setting (May be different for your Router)
#2: Use different SSID for 2.4 GHz & 5.0 GHz. If you keep the same name you have no idea which frequency your device is using. 5.0 is better than 2.4, however not all your device can connect to 5.0. For example iPhone 4 & 4S can connect to "Wireless N" only on 2.4 GHz. iPhone 5 can connect to "Wireless N" on both 2.4 GHz & 5.0 GHz. All iPads (Original, 2 & new) supports "Wireless N" on both 2.4 GHz & 5.0 GHz.
#3: If your Router supports "Wireless N" mode change the settings from "Mixed" to "Wireless N". iPhone 3G & 3GS doesn't support "Wireless N". If you still own one of these you should leave the Wireless mode to "Mixed" at least for 2.4 GHz. You can have different modes for 2.4 GHz & 5.0 GHz and that the reason you should use different SSID name.
Read "How to get the most out of your dual band router" from the PDF below. It has ton of information.
Also the following link describes the difference between a, b, g and n networks.
#4: Switch the devices that support 5.0 GHz/ Wireless N to the respective SSID to get the most out of it. In my case I switched to 5.0 GHz/Wireless N network on my laptop, Macbook pro, iPad.
#5: My manual suggests to use "WP2-Personal" security for "Wireless N" better performance.
Wednesday, September 19, 2012
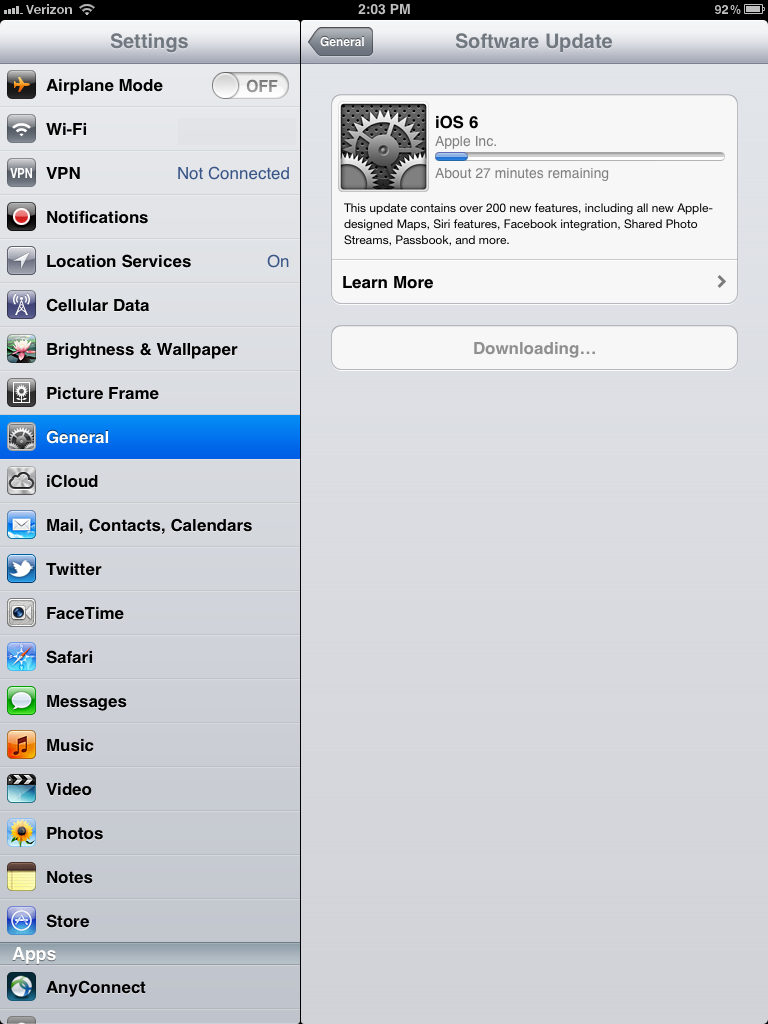
iOS 6.0 is out
Go ahead and try it from your iPhone/iPad. It's not yet posted on the Apple website.
Excited with all the features of iOS 6.0 except Map. Sorry Apple, you screwed up Map.
It took 30 minutes for my iPad 3G to update to iOS 6.0. Whats amazing is after the update, still my apps are in the same suspended state.
Thursday, August 30, 2012
Apache Virtualhost URL Rewrite - Keys to Success
Have you ever tried to make Apache URL Rewrite to work at the Virtualhost level and felt like you are banging your head on the wall, don't think you are alone, I am with you.
After lots and lots of search, read through documentation, trial and error, I finally got it to work. This configuration will work with a Reverse Proxy Server in the front. Also if Apache & Reverse Proxy Servers are listening in different port (Example Reverse Proxy on port 80 and Apache on port 8080), use the Apache listening port on your VirtualHost configuration.
Always start with "Apache -S" (In some cases httpd -S) option. This will list all the issues found in httpd.conf file. Actually I found couple of issues with my httpd.conf file, in fact Apache was up and running with those issues and driving me crazy.
For the Jump Start just copy paste the following lines into to your https.conf file and JUST change the domain name.
NameVirtualHost *:80
<VirtualHost *:80>
ServerName mydomain.com
DocumentRoot "c:\www\mydomain.com"
# Following two lines are handy for debugging, but don't do it on your production machine
RewriteLog "C:\www\temp\rewrite.log"
RewriteLogLevel 9
RewriteEngine on
# Put all your ReWrite rules over here for mydomain.com
RewriteRule index.html$ welcome.html [NC,L]
</VirtualHost>
<VirtualHost *:80>
ServerName myotherdomain.com
DocumentRoot "c:\www\myotherdomain.com"
RewriteEngine on
# Put all your ReWrite rules over here for myotherdomain.com
RewriteRule index.html$ welcome.html [NC,L]
</VirtualHost>
Now lets talk about all the mistakes you can do (To be precise I did)
Mistake #0:
Trying to debug without running "Apache -S" (In some cases httpd -S) command. You must resolve all the issues listed by that command, before you start think about why is not working.
Mistake #1:
<VirtualHost *:80> element alone is not sufficient to trigger URL Rewrite and you need NameVirtualHost *:80 prior to that.
Mistake #2:
NameVirtualHost mydomain.com:80 is incorrect. Just go with *:80
Mistake #3:
What ever you put in after NameVirtualHost should be exactly repeated in every VirtualHost element.
Each server should be specified in ServerName attribute and not in VirtualHost
For example
NameVirtualHost *:80
<VirtualHost mydomain.com:80>
</VirtualHost>
<VirtualHost myotherdomain.com:80>
</VirtualHost>
is incorrect.
Correct way to do it is
NameVirtualHost *:80
<VirtualHost *:80>
ServerName mydomain.com
</VirtualHost>
<VirtualHost *:80>
ServerName myotherdomain.com
</VirtualHost>
Mistake #4:
No port to be specified in the ServerName
For example
<VirtualHost *:80>
ServerName mydomain.com:80
</VirtualHost>
is incorrect.
Right one is
<VirtualHost *:80>
ServerName mydomain.com
</VirtualHost>
Mistake #5:
All VirtualHost element must have at least ServerName & DocumentRoot in it. I will add "ReWriteEngine On" to that.
For Example
RewriteEngine on # Globally Turning it on has no impact on VirtualHost
<VirtualHost *:80>
ServerName mydomain.com
DocumentRoot "c:\www\mydomain.com"
RewriteRule index.html$ welcome.html [NC,L]
</VirtualHost>
won't do any URL ReWrite.
Instead you must put that in inside the VirtualHost
<VirtualHost *:80>
ServerName mydomain.com
DocumentRoot "c:\www\mydomain.com"
RewriteEngine on # You need it here.
RewriteRule index.html$ welcome.html [NC,L]
</VirtualHost>
Mistake #6:
This may sound sillly, but I am sure someone will do it.
Putting "."(dot) instead of ":" (colon) between * and 80.
*.80 is incorrect
*:80 is correct.
This may happen especially if you use IP address instead of star.
Still reading my blog, ok then, let me drive you crazy.
Lets talk about Apache listening on multiple ports and settingup VirtualHosts.
Lets say your Apache is listening on Port 80 as well as 8080 and want to setup Virtual host.
Here is the right way to do it.
NameVirtualHost *:80
NameVirtualHost *:8080
<VirtualHost *:80 *:8080>
ServerName mydomain.com
DocumentRoot "c:\www\mydomain.com"
RewriteEngine on # You need it here.
RewriteRule index.html$ welcome.html [NC,L]
</VirtualHost>
NameVirtualHost *:80 *:8080 # IS INCORRECT
Well it took two days for me solve this problem. I would really appreciate if you drop a comment, whether it was helpful solving your problem or not. Especially if you can mention the Mistake # that would be great, of course you can be anonymous.
After lots and lots of search, read through documentation, trial and error, I finally got it to work. This configuration will work with a Reverse Proxy Server in the front. Also if Apache & Reverse Proxy Servers are listening in different port (Example Reverse Proxy on port 80 and Apache on port 8080), use the Apache listening port on your VirtualHost configuration.
Always start with "Apache -S" (In some cases httpd -S) option. This will list all the issues found in httpd.conf file. Actually I found couple of issues with my httpd.conf file, in fact Apache was up and running with those issues and driving me crazy.
For the Jump Start just copy paste the following lines into to your https.conf file and JUST change the domain name.
NameVirtualHost *:80
<VirtualHost *:80>
ServerName mydomain.com
DocumentRoot "c:\www\mydomain.com"
# Following two lines are handy for debugging, but don't do it on your production machine
RewriteLog "C:\www\temp\rewrite.log"
RewriteLogLevel 9
RewriteEngine on
# Put all your ReWrite rules over here for mydomain.com
RewriteRule index.html$ welcome.html [NC,L]
</VirtualHost>
<VirtualHost *:80>
ServerName myotherdomain.com
DocumentRoot "c:\www\myotherdomain.com"
RewriteEngine on
# Put all your ReWrite rules over here for myotherdomain.com
RewriteRule index.html$ welcome.html [NC,L]
</VirtualHost>
Now lets talk about all the mistakes you can do (To be precise I did)
Mistake #0:
Trying to debug without running "Apache -S" (In some cases httpd -S) command. You must resolve all the issues listed by that command, before you start think about why is not working.
Mistake #1:
<VirtualHost *:80> element alone is not sufficient to trigger URL Rewrite and you need NameVirtualHost *:80 prior to that.
Mistake #2:
NameVirtualHost mydomain.com:80 is incorrect. Just go with *:80
Mistake #3:
What ever you put in after NameVirtualHost should be exactly repeated in every VirtualHost element.
Each server should be specified in ServerName attribute and not in VirtualHost
For example
NameVirtualHost *:80
<VirtualHost mydomain.com:80>
</VirtualHost>
<VirtualHost myotherdomain.com:80>
</VirtualHost>
is incorrect.
Correct way to do it is
NameVirtualHost *:80
<VirtualHost *:80>
ServerName mydomain.com
</VirtualHost>
<VirtualHost *:80>
ServerName myotherdomain.com
</VirtualHost>
Mistake #4:
No port to be specified in the ServerName
For example
<VirtualHost *:80>
ServerName mydomain.com:80
</VirtualHost>
is incorrect.
Right one is
<VirtualHost *:80>
ServerName mydomain.com
</VirtualHost>
Mistake #5:
All VirtualHost element must have at least ServerName & DocumentRoot in it. I will add "ReWriteEngine On" to that.
For Example
RewriteEngine on # Globally Turning it on has no impact on VirtualHost
<VirtualHost *:80>
ServerName mydomain.com
DocumentRoot "c:\www\mydomain.com"
RewriteRule index.html$ welcome.html [NC,L]
</VirtualHost>
won't do any URL ReWrite.
Instead you must put that in inside the VirtualHost
<VirtualHost *:80>
ServerName mydomain.com
DocumentRoot "c:\www\mydomain.com"
RewriteEngine on # You need it here.
RewriteRule index.html$ welcome.html [NC,L]
</VirtualHost>
Mistake #6:
This may sound sillly, but I am sure someone will do it.
Putting "."(dot) instead of ":" (colon) between * and 80.
*.80 is incorrect
*:80 is correct.
This may happen especially if you use IP address instead of star.
Still reading my blog, ok then, let me drive you crazy.
Lets talk about Apache listening on multiple ports and settingup VirtualHosts.
Lets say your Apache is listening on Port 80 as well as 8080 and want to setup Virtual host.
Here is the right way to do it.
NameVirtualHost *:80
NameVirtualHost *:8080
<VirtualHost *:80 *:8080>
ServerName mydomain.com
DocumentRoot "c:\www\mydomain.com"
RewriteEngine on # You need it here.
RewriteRule index.html$ welcome.html [NC,L]
</VirtualHost>
NameVirtualHost *:80 *:8080 # IS INCORRECT
Well it took two days for me solve this problem. I would really appreciate if you drop a comment, whether it was helpful solving your problem or not. Especially if you can mention the Mistake # that would be great, of course you can be anonymous.
Friday, August 24, 2012
CheatSheet for Apache & Regular Expression ...
I happened to stumble on this site while trying to figure out Apache Mod_Rewrite to work.
http://www.addedbytes.com/cheat-sheets/
This site has Cheet Sheets for Apache, Regular Expressions, CSS, Javascript , you name it, he got it.
Thank you Dave.
http://www.addedbytes.com/cheat-sheets/
This site has Cheet Sheets for Apache, Regular Expressions, CSS, Javascript , you name it, he got it.
Thank you Dave.
Tuesday, August 21, 2012
#AlertBot -Didn't you learn your lessons
Didn't your learn your lessons from the past "test" email you have sent to all your customers. You may be great at monitoring Website. You better Monitor your email as well.
On Aug 14, I got a marketing email with subject "Test".
I got one more today (Aug 21st) with the right subject but for the event already occurred on Aug 14th?
This is the first time I am getting an invitation one week after event :)
On Aug 14, I got a marketing email with subject "Test".
I got one more today (Aug 21st) with the right subject but for the event already occurred on Aug 14th?
This is the first time I am getting an invitation one week after event :)
Tuesday, August 14, 2012
Creating shortcut for a network folder in Mac
*** Read my Update 2 at the bottom of this post for a quick solution. ***
Being Windows User for a long time, it was always easy to create a short cut in Windows using "Ctrl" + "Shift" drag of a folder to Desktop. ("Ctrl" Drag folder Copies the Folder and "Shift" drag moves the folder, in case if you don't know).
In Mac if you drag a folder to Desktop it copies it and if you hold "Apple" key while dragging it moves it. Other way to create a shortcut is to right click and choose "Make Alias". It creates the shortcut in the same folder and then you can move it to the right place.
However if you want to create a shortcut for a network share, for example smb://server_name/shared_folder it was impossible because you may not have right access at smb://server_name level. I found a trick to create a shortcut for network folder using "ln" command. For those of you who don't know, when you access a network share using smb://server/folder, mac automatically mount it under /Volumes/folder(Note: No server name over here). Just open up terminal window and switch to Desktop folder.
Just type this magic command to create a shortcut
$ ln -s /Volumes/<network_folder_name> <Your Shortcut Name>
PS: "ln" stands for link and "ln -s" is for creating "Symbolic Link", fancy name for shortcut in Unix world.
Update1: Found one more option through Google. You can have Mac place the shortcut for all connected Servers in Desktop by checking the option "Connected Serveres" from Finder Preference option. However this will create the link for the Server and not the specific folder you are interested in.
Update 2: Actually if you hold "Command/Apple" + "Option" key while dragging folder to the desktop it creates the shortcut. Just drag the folder to the Desktop while holding the above two keys from /Volumes/folder_name location.
Being Windows User for a long time, it was always easy to create a short cut in Windows using "Ctrl" + "Shift" drag of a folder to Desktop. ("Ctrl" Drag folder Copies the Folder and "Shift" drag moves the folder, in case if you don't know).
In Mac if you drag a folder to Desktop it copies it and if you hold "Apple" key while dragging it moves it. Other way to create a shortcut is to right click and choose "Make Alias". It creates the shortcut in the same folder and then you can move it to the right place.
However if you want to create a shortcut for a network share, for example smb://server_name/shared_folder it was impossible because you may not have right access at smb://server_name level. I found a trick to create a shortcut for network folder using "ln" command. For those of you who don't know, when you access a network share using smb://server/folder, mac automatically mount it under /Volumes/folder(Note: No server name over here). Just open up terminal window and switch to Desktop folder.
Just type this magic command to create a shortcut
$ ln -s /Volumes/<network_folder_name> <Your Shortcut Name>
PS: "ln" stands for link and "ln -s" is for creating "Symbolic Link", fancy name for shortcut in Unix world.
Update 2: Actually if you hold "Command/Apple" + "Option" key while dragging folder to the desktop it creates the shortcut. Just drag the folder to the Desktop while holding the above two keys from /Volumes/folder_name location.
Thursday, August 9, 2012
Customizing Tomcat access log
By default Tomcat logs every web request it receives in $TOMCAT_HOME/logs folder in a file called "localhost_access_log<Date>.txt" and it does creates one log file for every day.
By default it captures the request IP address, time of the request, bytes sent, status of request etc.
If you want to change it, for example let say you are using an reverse proxy server and wants to log the actual client IP address present in "X-Forwarded-For" then you need to specify the same in $TOMCAT_HOME/config/server.xml file.
Look for the Valve element and additional parameters you want to capture to the pattern element. You can as well configure log file name, location over here.
<Valve className="org.apache.catalina.valves.AccessLogValve" directory="logs"
prefix="localhost_access_log." suffix=".txt"
pattern="%a %{X-Forwarded-For}i %T %t %s %b" />
For more configuration options refer to Tomcat Documentation. http://tomcat.apache.org/tomcat-7.0-doc/config/valve.html
For your quick reference(From Apache Documentation mentioned above).
By default it captures the request IP address, time of the request, bytes sent, status of request etc.
If you want to change it, for example let say you are using an reverse proxy server and wants to log the actual client IP address present in "X-Forwarded-For" then you need to specify the same in $TOMCAT_HOME/config/server.xml file.
Look for the Valve element and additional parameters you want to capture to the pattern element. You can as well configure log file name, location over here.
<Valve className="org.apache.catalina.valves.AccessLogValve" directory="logs"
prefix="localhost_access_log." suffix=".txt"
pattern="%a %{X-Forwarded-For}i %T %t %s %b" />
For more configuration options refer to Tomcat Documentation. http://tomcat.apache.org/tomcat-7.0-doc/config/valve.html
For your quick reference(From Apache Documentation mentioned above).
Values for the
pattern attribute are made up of literal text strings, combined with pattern identifiers prefixed by the "%" character to cause replacement by the corresponding variable value from the current request and response. The following pattern codes are supported:- %a - Remote IP address
- %A - Local IP address
- %b - Bytes sent, excluding HTTP headers, or '-' if zero
- %B - Bytes sent, excluding HTTP headers
- %h - Remote host name (or IP address if
enableLookupsfor the connector is false) - %H - Request protocol
- %l - Remote logical username from identd (always returns '-')
- %m - Request method (GET, POST, etc.)
- %p - Local port on which this request was received
- %q - Query string (prepended with a '?' if it exists)
- %r - First line of the request (method and request URI)
- %s - HTTP status code of the response
- %S - User session ID
- %t - Date and time, in Common Log Format
- %u - Remote user that was authenticated (if any), else '-'
- %U - Requested URL path
- %v - Local server name
- %D - Time taken to process the request, in millis
- %T - Time taken to process the request, in seconds
- %I - Current request thread name (can compare later with stacktraces)
There is also support to write information incoming or outgoing headers, cookies, session or request attributes and special timestamp formats. It is modeled after the Apache HTTP Serverlog configuration syntax:
%{xxx}ifor incoming headers%{xxx}ofor outgoing response headers%{xxx}cfor a specific cookie%{xxx}rxxx is an attribute in the ServletRequest%{xxx}sxxx is an attribute in the HttpSession%{xxx}txxx is an enhanced SimpleDateFormat pattern
Subscribe to:
Posts (Atom)