I already blogged about connecting to Oracle and Redshift from KDB.
Here I will cover SQL Server.
Step 0: Install Java (preferably 8) if you have not installed. java -version should give you the version
Step 1:
Follow instruction http://code.kx.com/wiki/Babel and Install Babel.
You can download Babel from wget https://github.com/CharlesSkelton/babel/raw/master/dist/babel.zip
and unzip it.
Step 2:
Credit: https://stackoverflow.com/questions/5307048/where-do-i-install-a-jdbc-driver-on-ubuntu
I assume you already have Java 8 installed. Download the corresponding SQL Server JDBC driver.
https://www.microsoft.com/en-us/download/details.aspx?id=11774
Download sqljdbc_6.0.8112.200_enu.tar.gz
Unzip and untar the file
$ gzip -d sqljdbc_6.0.7507.100_enu.tar.gz
$ tar -xf sqljdbc_6.0.7507.100_enu.tar
You can optionally create a soft link for your corresponding SQL JDBC under babel/lib. This will come in handy while starting Babel.
Note: Choose the right driver while creating the soft link: sqljdbc_6.0/enu/jre8/sqljdbc42.jar is the right one Java 8
Step 3: Start Babel
java -Xmx1024m -cp "babel.jar:sqljdbc42.jar" de.skelton.babel.Babel 6868 com.microsoft.sqlserver.jdbc.SQLServerDriver
You might have to substitute the actual path of babel.jar & sqljdbc42.jar (For Java 8)
You will see message something like this
Babel for kdb+ v1.34 2014.03.24
2018.05.02 10:05:22.571 Listening on localhost:6868 for connections...
2018.05.02 10:08:06.513 Authenticating balaji
2018.05.02 10:08:06.513 Accepted connection from /127.0.0.1:38126
2018.05.02 10:15:32.779 Request from /127.0.0.1:38126
Step 4: Start Q and connect to SQL Server
$ q
KDB+ 3.2 2015.05.27 Copyright (C) 1993-2015 Kx Systems
l32/ 4()core 7965MB balaji balaji 127.0.01 NONEXPIRE
Welcome to kdb+ 32bit edition
q)h:hopen 6868
q)r:h("query";"jdbc:sqlserver://sqldb-host:1433;databaseName=mysqldb;user=sqluser;password=xxxTopSecret";"SELECT * FROM <your table>")
q)meta r
q)count r
q)r
..... Your Table shown here ....
And that's it
Wednesday, May 2, 2018

Tuesday, October 17, 2017
Changing the default Apache web directory(document root) on RHEL without disabling SE Linux
Default document root of Apache in RHEL is "/var/www/html". if you have tried changing it to something else like "/web/apps" then you would get 403 forbidden error.
If you google it, I am sure you will find a solution to include /web/apps into <Directory> directive and you will be asked to set +x permissions on /web & /web/apps folder (using chmod 755)
And your Apache vhost will look similar to it
After doing it if you restart Apache and try you will still get "403 forbidden error"
If you further google, you will find out this is because of SE Linux and steps to disable that.
Basically "sudo setenforce 0", and you can call it a day since everything start to work.
However with "sudo setenforce 0" you are disabling the entire SE Linux security. There is a better way to do that and that is what all this Blog is about.
And here you go.
That's it folks. If you want to see what magic it does, use the special flag -Z with ls
httpd_sys_content_t is what makes the Apache to server from /web/apps directory
More info at
https://access.redhat.com/documentation/en-US/Red_Hat_Enterprise_Linux/6/html/Security-Enhanced_Linux/sect-Security-Enhanced_Linux-Troubleshooting-Top_Three_Causes_of_Problems.html
If you google it, I am sure you will find a solution to include /web/apps into <Directory> directive and you will be asked to set +x permissions on /web & /web/apps folder (using chmod 755)
And your Apache vhost will look similar to it
<VirtualHost *:80>
 ServerName  www.example.com
 DocumentRoot /web/apps
  <Directory "/web/apps" >
   Options Indexes FollowSymLinks
   AllowOverride None
   Require all granted
  </Directory>
</VirtualHost>
After doing it if you restart Apache and try you will still get "403 forbidden error"
If you further google, you will find out this is because of SE Linux and steps to disable that.
Basically "sudo setenforce 0", and you can call it a day since everything start to work.
However with "sudo setenforce 0" you are disabling the entire SE Linux security. There is a better way to do that and that is what all this Blog is about.
And here you go.
sudo semanage fcontext -a -t httpd_sys_content_t "/web/apps(/.*)?"sudo restorecon -R -v /web/appsThat's it folks. If you want to see what magic it does, use the special flag -Z with ls
[ec2-user@ip-10-0-0-1 ~]$ ls -Z /var/www
drwxr-xr-x. root root system_u:object_r:httpd_sys_script_exec_t:s0 cgi-bin
drwxr-xr-x. root root system_u:object_r:httpd_sys_content_t:s0 html
[ec2-user@ip-10-0-0-1 ~]$ ls -Z /web
drwxrwxr-x. rxds rxds unconfined_u:object_r:httpd_sys_content_t:s0 apps
drwxrwxr-x. rxds rxds unconfined_u:object_r:default_t:s0 another_directory
More info at
https://access.redhat.com/documentation/en-US/Red_Hat_Enterprise_Linux/6/html/Security-Enhanced_Linux/sect-Security-Enhanced_Linux-Troubleshooting-Top_Three_Causes_of_Problems.html
Thursday, September 21, 2017
$.get Cross Domain request with withCredentials: true
Even though $.get works for Cross-Domain(As long as CORS enabled), it doesn't send cross domain cookies while making request.
Meaning, let's say you have logged into https://cd-example.org and cookie is all set.
Now you want to make a cross domain request to https://cd-example.org from another domain https://example.org
If you make $.get("https://example-cd.org/someurl/",function(data){console.log(data)})
it won't work, because it doesn't send cd-example.org cookie. You need to use $.ajax with xhrFields: { withCredentials: true}
I just found a trick to workaround this $.get issue. Set {xhrFields: { withCredentials: true}} in $.ajaxSetup, which automatically gets attached to $.get and everything works magically.
So first
$.ajaxSetup({xhrFields: { withCredentials: true} })
and then make
$.get("https://example-cd.org/someurl/",function(data){console.log(data)})
Wednesday, June 21, 2017
Connecting to Redshift from KDB+ (Using Babel)
If you want to connect to Oracle from KDB+ refer to my "Connecting to Oracle from KDB+ (Using Babel)" post.
Let's assume your q home is /opt/q
Download babel.zip & unzip it
You will see babel.jar & lib folder
Goto lib and download Amazon Redshift jdbc driver
$cd lib
Here is the scary part. Including Redshift driver (lib/RedshiftJDBC42-1.2.1.1001.jar) into babel.jar
http://code.kx.com/wiki/Babel#Specifying_your_jdbc_driver_and_repacking_the_jar
 Save and exit vi
Recompile the jar file and ignore the warnings
Now start the babel.jar and make it listen to any port you want
Start the q in another terminal and fire the query..
Substitute the jdbc connection string with yours. You can get it from AWS Redshit cluster config page. Of course you should know your user id and password.
All Credits goes to:
Bable reference: https://github.com/CharlesSkelton/babel
KX reference: http://code.kx.com/wiki/Babel
Redshift reference: http://docs.aws.amazon.com/redshift/latest/mgmt/configure-jdbc-connection.html#download-jdbc-driver
Let's assume your q home is /opt/q
$ mkdir babel
$ cd babel
Download babel.zip & unzip it
$ wget https://github.com/CharlesSkelton/babel/raw/master/dist/babel.zip
$ unzip babel.zip
$ ls -la
total 4664
drwxr-xr-x 5 balaji staff 170 Jun 21 17:53 .
drwxr-xr-x@ 10 balaji staff 340 Jun 21 17:52 ..
-rw-r--r-- 1 balaji staff 27713 Mar 24 2014 babel.jar
-rw-r--r--@ 1 balaji staff 2357704 Jun 21 17:52 babel.zip
drwxr-xr-x 8 balaji staff 272 Jun 21 17:57 lib
Goto lib and download Amazon Redshift jdbc driver
$cd lib
$ wget https://s3.amazonaws.com/redshift-downloads/drivers/RedshiftJDBC42-1.2.1.1001.jar
$ ls -la
total 9392
drwxr-xr-x 8 balaji staff 272 Jun 21 17:57 .
drwxr-xr-x 5 balaji staff 170 Jun 21 17:53 ..
-rw-r--r--@ 1 balaji staff 2316196 Nov 17 2016 RedshiftJDBC42-1.2.1.1001.jar
-rw-r--r-- 1 balaji staff 21986 Mar 24 2014 csvjdbc.jar
-rw-r--r-- 1 balaji staff 706710 Mar 24 2014 hsqldb.jar
-rw-r--r-- 1 balaji staff 463412 Mar 24 2014 janino.jar
-rw-r--r-- 1 balaji staff 703265 Mar 24 2014 mysql-connector-java-5.1.6-bin.jar
-rw-r--r-- 1 balaji staff 583286 Mar 24 2014 sqljdbc.jar
Here is the scary part. Including Redshift driver (lib/RedshiftJDBC42-1.2.1.1001.jar) into babel.jar
http://code.kx.com/wiki/Babel#Specifying_your_jdbc_driver_and_repacking_the_jar
$ jar -xvf babel.jar
created: META-INF/
inflated: META-INF/MANIFEST.MF
created: de/
created: de/skelton/
created: de/skelton/babel/
created: de/skelton/util/
created: kx/
inflated: de/skelton/babel/Babel$1.class
inflated: de/skelton/babel/Babel$2.class
inflated: de/skelton/babel/Babel.class
inflated: de/skelton/util/Logger.class
inflated: de/skelton/util/SmartArray.class
inflated: kx/c$Dict.class
inflated: kx/c$Flip.class
inflated: kx/c$IAuthenticate.class
inflated: kx/c$KException.class
inflated: kx/c$Minute.class
inflated: kx/c$Month.class
inflated: kx/c$Msg.class
inflated: kx/c$Second.class
inflated: kx/c$Timespan.class
inflated: kx/c.class
$vi META-INF/MANIFEST.MF
add lib/RedshiftJDBC42-1.2.1.1001.jar
add lib/RedshiftJDBC42-1.2.1.1001.jar

Recompile the jar file and ignore the warnings
$ jar umf META-INF/MANIFEST.MF babel.jar
Jun 21, 2017 6:07:47 PM java.util.jar.Attributes read
WARNING: Duplicate name in Manifest: Manifest-Version.
Ensure that the manifest does not have duplicate entries, and
that blank lines separate individual sections in both your
manifest and in the META-INF/MANIFEST.MF entry in the jar file.
Jun 21, 2017 6:07:47 PM java.util.jar.Attributes read
WARNING: Duplicate name in Manifest: Ant-Version.
Ensure that the manifest does not have duplicate entries, and
that blank lines separate individual sections in both your
manifest and in the META-INF/MANIFEST.MF entry in the jar file.
Jun 21, 2017 6:07:47 PM java.util.jar.Attributes read
WARNING: Duplicate name in Manifest: Created-By.
Ensure that the manifest does not have duplicate entries, and
that blank lines separate individual sections in both your
manifest and in the META-INF/MANIFEST.MF entry in the jar file.
Jun 21, 2017 6:07:47 PM java.util.jar.Attributes read
WARNING: Duplicate name in Manifest: X-COMMENT.
Ensure that the manifest does not have duplicate entries, and
that blank lines separate individual sections in both your
manifest and in the META-INF/MANIFEST.MF entry in the jar file.
Jun 21, 2017 6:07:47 PM java.util.jar.Attributes read
WARNING: Duplicate name in Manifest: Main-Class.
Ensure that the manifest does not have duplicate entries, and
that blank lines separate individual sections in both your
manifest and in the META-INF/MANIFEST.MF entry in the jar file.
Cleanup de, kx directories if you want to
$rm -rf de kx META-INF
Now start the babel.jar and make it listen to any port you want
$ java -jar babel.jar 6868 com.amazon.redshift.jdbc42.Driver
Babel for kdb+ v1.34 2014.03.24
2017.06.21 18:11:16.437 Listening on localhost:6868 for connections...
...
Start the q in another terminal and fire the query..
Substitute the jdbc connection string with yours. You can get it from AWS Redshit cluster config page. Of course you should know your user id and password.
$ q
KDB+ 3.5 2017.06.15 Copyright (C) 1993-2017 Kx Systems
m32/ 4()core 16384MB balaji balaji-macbook.local 255.255.255.255 NONEXPIRE
Welcome to kdb+ 32bit edition
For support please see http://groups.google.com/d/forum/personal-kdbplus
Tutorials can be found at http://code.kx.com/wiki/Tutorials
To exit, type \\
To remove this startup msg, edit q.q
q)h:hopen 6868
q)h("query";"jdbc:redshift://redshift.xxxxxxxxxx.us-east-2.redshift.amazonaws.com:5439/dev?user=balaji&password=ThisIsNotSecreat";"select distinct(tablename) from pg_table_def where schemaname = 'public'")
tablename
----------
"category"
"date"
"event"
"listing"
"sales"
"users"
"venue"
q)
 |
| Picture Credit: AWS Redshift documentation |
All Credits goes to:
Bable reference: https://github.com/CharlesSkelton/babel
KX reference: http://code.kx.com/wiki/Babel
Redshift reference: http://docs.aws.amazon.com/redshift/latest/mgmt/configure-jdbc-connection.html#download-jdbc-driver
Monday, April 3, 2017
HTTPS Reverse Proxy settings for Apex applications using ORDS
If you are hosting your Apex apps with a cloud provider who is serving the apps on HTTPS (For example https://apex.oracle.com WARNING: apex.oracle.com should only be used for evaluating Apex and should never be used for hosting production apps), and you want to access your apps using your domain like https://apex.mycompany.com then you need do little bit of extra to get it working on Apache.
Here is the configuration you need for that. Basically you need to turn off Cert verify and keep ProxyPreserveHost on
<VirtualHost *:443>
ServerName apex.mycompany.com
DocumentRoot /var/www/html
# Configure your SSL Cert here
# To enable SSL Proxy support
SSLProxyEngine on
ProxyPreserveHost On
SSLProxyVerify none
SSLProxyCheckPeerCN off
SSLProxyCheckPeerName off
SSLProxyCheckPeerExpire off
# Proxy URL Rewrite
ProxyPass / https://apex.oracle.com/
ProxyPassReverse / https://apex.oracle.com/
</VirtualHost>
Here is the configuration you need for that. Basically you need to turn off Cert verify and keep ProxyPreserveHost on
<VirtualHost *:443>
ServerName apex.mycompany.com
DocumentRoot /var/www/html
# Configure your SSL Cert here
# To enable SSL Proxy support
SSLProxyEngine on
ProxyPreserveHost On
SSLProxyVerify none
SSLProxyCheckPeerCN off
SSLProxyCheckPeerName off
SSLProxyCheckPeerExpire off
# Proxy URL Rewrite
ProxyPass / https://apex.oracle.com/
ProxyPassReverse / https://apex.oracle.com/
</VirtualHost>
Wednesday, January 18, 2017
Installing Oracle ODBC driver on uBuntu 16.04 server
Note: Following steps are for ubuntu 16.04 server. Change the steps based on your Linux flavor
First start with unixodbc installation
$sudo apt-get install unixodbc
To conform the installation just type in isql from the shell and should work.
Install the alien utility (You need to install local .rpm packages)
$sudo apt-get install alien
Install libaio1 64 bit$sudo apt-get install libaio1
I have followed the steps from this post. But simplified it little bit.
https://help.ubuntu.com/community/Oracle%20Instant%20Client
You need to first download them from Oracle site.
Instant Client Home page:http://www.oracle.com/technetwork/database/features/instant-client/index-097480.html
Download page: http://www.oracle.com/technetwork/topics/linuxx86-64soft-092277.html (Linux 64 bit)
I went with the following packages
Download the above .rpm files locally on your machine and upload it to the Linux server or directly download it on your Linux server. wget won't work since it requires you to sign in to Oracle site.
First start with unixodbc installation
$sudo apt-get install unixodbc
To conform the installation just type in isql from the shell and should work.
Install the alien utility (You need to install local .rpm packages)
$sudo apt-get install alien
Install libaio1 64 bit$sudo apt-get install libaio1
I have followed the steps from this post. But simplified it little bit.
https://help.ubuntu.com/community/Oracle%20Instant%20Client
You need to first download them from Oracle site.
Instant Client Home page:http://www.oracle.com/technetwork/database/features/instant-client/index-097480.html
Download page: http://www.oracle.com/technetwork/topics/linuxx86-64soft-092277.html (Linux 64 bit)
I went with the following packages
Instant Client Package - Basic Instant Client Package - JDBC Supplement Instant Client Package - SQL*Plus Instant Client Package - ODBC |
Next install the rpm's using the alien utility.
sudo alien -i oracle-instantclient12.1-basic-12.1.0.2.0-1.x86_64.rpm
Install the other rpms in the same way
Setup the Oracle environment variables globally. You can do it in your user .profile as well.
Create a file "sudo vi /etc/profile.d/oracle.sh" with the following content.
export ORACLE_HOME=/usr/lib/oracle/12.1/client64
export PATH=$PATH:$ORACLE_HOME/bin
export LD_LIBRARY_PATH=/usr/lib/oracle/12.1/client64/lib/${LD_LIBRARY_PATH:+:$LD_LIBRARY_PATH}
logoff and login back and try sqlplus
user@ubuntu:~$ which sqlplus
/usr/lib/oracle/12.1/client64/bin/sqlplus
user@ubuntu:~$ sqlplus
SQL*Plus: Release 12.1.0.2.0 Production on Wed Jan 18 12:14:14 2017
Copyright (c) 1982, 2014, Oracle. All rights reserved.
Enter user-name:
If you get the above response, you are almost done. At this stage you can connect to your Oracle database using EZConnect string
$ sqlplus scott/tiger@myoracledb.example.com:1521/ORCL
SQL*Plus: Release 12.1.0.2.0 Production on Wed Jan 18 12:17:00 2017
Copyright (c) 1982, 2014, Oracle. All rights reserved.
Last Successful login time: Wed Jan 18 2017 02:22:27 -05:00
Connected to:
Oracle Database 12c Standard Edition Release 12.1.0.2.0 - 64bit Production
SQL>
Just finish it up by setting up sqlnet.ora and tnsnames.ora
Create /network/admin directory under $ORACLE_HOME (/usr/lib/oracle/12.1/client64) folder
Under the same create sqlnet.ora. Sample below
names.directory_path = (EZCONNECT, LDAP, TNSNAMES, HOSTNAME)
Create tnsnames.ora Sample content below
MY_ORACLE_DB= (description= (address_list= (address = (protocol = TCP)(host = myoracledb.example.com)(port = 1521)) ) (connect_data = (service_name=ORCL) ))
Now you can connect using $sqlplus scott/tiger@MY_ORACLE_DB
You are done and enjoy.
Sunday, June 14, 2015
Configuring Oracle ORDS/Apex Listener with Oracle OID/LDAP/TNS/EZ Connect
I have been using ORDS since Apex Listener 1.0 beta, however didn't figure out how to connect it to an Oracle OID. I feel ORDS documentation should include sample configurations for each connection types. Till then here is your unofficial documentation.
Following is tested with Apex Listener 2.0.10.289.08.09. However I believe will work with ORDS 3.0 as well.
#1: Connecting to Oracle OID
<entry key="db.connectionType">customurl</entry>
<entry key="db.customURL">
jdbc:oracle:thin:@ldap://ldap.example.com:7777/ORCL,cn=OracleContext,dc=example,dc=com
</entry>
<entry key="db.password">@encrypted password</entry>
References:
ORDS Configuration: https://docs.oracle.com/cd/E56351_01/doc.30/e56293/config_file.htm#AELIG7204
LDAP Syntax http://docs.oracle.com/cd/B28359_01/java.111/b31224/urls.htm#CHDBICFA
Use ldaps for SSL.
ldap.example.com:7777 => Is your ldap server name and port
ORCL => Database Service name configured in OID. Replace it with the Database you want to connect
cn=OracleContext => Keep it. I believe this is something defined at the OID level
dc=example,dc=com => Thats your domain. If you have 3 parts in your domaninlike example.co.uk then use dc=example,dc=co,dc=uk
#2: Connecting using TNS Names
You can do it in two ways. You can have a tnsnames.ora file with database connect strings defined in it. For that use the following (Note: connectionType=tns)
<entry key="db.connectionType">tns</entry>
<entry key="db.tnsDirectory">/home/oracle/admin/tnsnames.ora</entry>
<entry key="db.tnsAliasName">ORCL</entry>
<entry key="db.password">@encrypted password</entry>
Or you can specify the entire TNS Connect string using db.CustomURL like below (Note: connectionType=customurl)
<entry key="db.connectionType">customurl</entry>
<entry key="db.customURL">
jdbc:oracle:thin:@(DESCRIPTION=(ADDRESS=(PROTOCOL=TCP) (HOST=myhost)(PORT=1521))(CONNECT_DATA=(SERVICE_NAME=ORCL)))
</entry>
<entry key="db.password">@Your_encrypted_password</entry>
#3: Default EZ Connect method
This is the default when you configure ords war using $java -jar ords.war
You don't need to specify db.connectionType here, which default to "basic"
<entry key="db.hostname">myhost</entry>
<entry key="db.password">@ Your_encrypted_password </entry>
<entry key="db.port">1521</entry>
<entry key="db.servicename">ORCL</entry>
Following is tested with Apex Listener 2.0.10.289.08.09. However I believe will work with ORDS 3.0 as well.
#1: Connecting to Oracle OID
<entry key="db.connectionType">customurl</entry>
<entry key="db.customURL">
jdbc:oracle:thin:@ldap://ldap.example.com:7777/ORCL,cn=OracleContext,dc=example,dc=com
</entry>
<entry key="db.password">@encrypted password</entry>
References:
ORDS Configuration: https://docs.oracle.com/cd/E56351_01/doc.30/e56293/config_file.htm#AELIG7204
LDAP Syntax http://docs.oracle.com/cd/B28359_01/java.111/b31224/urls.htm#CHDBICFA
Use ldaps for SSL.
ldap.example.com:7777 => Is your ldap server name and port
ORCL => Database Service name configured in OID. Replace it with the Database you want to connect
cn=OracleContext => Keep it. I believe this is something defined at the OID level
dc=example,dc=com => Thats your domain. If you have 3 parts in your domaninlike example.co.uk then use dc=example,dc=co,dc=uk
#2: Connecting using TNS Names
You can do it in two ways. You can have a tnsnames.ora file with database connect strings defined in it. For that use the following (Note: connectionType=tns)
<entry key="db.connectionType">tns</entry>
<entry key="db.tnsDirectory">/home/oracle/admin/tnsnames.ora</entry>
<entry key="db.tnsAliasName">ORCL</entry>
<entry key="db.password">@encrypted password</entry>
Or you can specify the entire TNS Connect string using db.CustomURL like below (Note: connectionType=customurl)
<entry key="db.connectionType">customurl</entry>
<entry key="db.customURL">
jdbc:oracle:thin:@(DESCRIPTION=(ADDRESS=(PROTOCOL=TCP) (HOST=myhost)(PORT=1521))(CONNECT_DATA=(SERVICE_NAME=ORCL)))
</entry>
<entry key="db.password">@Your_encrypted_password</entry>
#3: Default EZ Connect method
This is the default when you configure ords war using $java -jar ords.war
You don't need to specify db.connectionType here, which default to "basic"
<entry key="db.hostname">myhost</entry>
<entry key="db.password">@ Your_encrypted_password </entry>
<entry key="db.port">1521</entry>
<entry key="db.servicename">ORCL</entry>
Wednesday, November 26, 2014
Sunday, November 16, 2014
Java Performance Analyser
Occasionally I get "Out Of Memory" error in my Apache Tomcat and with out thinking too much I will just bounce the server to solve the problem. I was searching for the same in Google and it took me to a blog post http://opcodesolutions.com/tech/solve-java-lang-outofmemoryerror-java-heap-space/ in which I found an interesting tool Visual VM.
My goal is not to re-produce every detail about this tool, Name says it all.
http://visualvm.java.net/
I just downloaded it and got up and running in seconds. I have not yet started playing with the tool, but I believe this will solve some of my Java Memory issues.
You can go through the screen cast of this tool from this page.
http://visualvm.java.net/gettingstarted.html
My goal is not to re-produce every detail about this tool, Name says it all.
http://visualvm.java.net/
I just downloaded it and got up and running in seconds. I have not yet started playing with the tool, but I believe this will solve some of my Java Memory issues.
You can go through the screen cast of this tool from this page.
http://visualvm.java.net/gettingstarted.html
Saturday, November 15, 2014
Connecting to Oracle from KDB+ (Using Babel)
I have recently started messing around KDB+ and playing with cryptic Q language.
I want to compare the performance of Oracle vs KDB+, and in order to do that I have to duplicate the Oracle table in KDB+. I tried through ODBC layer but didn't work. Then I found another elegant solution posted on the code.kx.com site using Babel.
http://code.kx.com/wiki/Babel
"Babel for kdb+ is a SQL gateway process that allows kdb+ to query other vendors databases via jdbc."
Babel act as a broker between KDB+ and any database that can be connected through JDBC library. Meaning KDB knows how to talk to Babel and Babel knows how to talk to Databases through JDBC Layer. Now lets get into details.
Step 1:
Download Babel: wget https://github.com/CharlesSkelton/babel/raw/master/dist/babel.zip
and unzip it.
Step 2:
Download ojdbc7.jar from oracle and copy it to bin directory under Babel. Note: odbc7 is for JDK 1.7 and if your Java version (java -version) is 1.6 you should use odbc6.jar.
http://www.oracle.com/technetwork/database/features/jdbc/default-2280470.html
Update: If you are using Java 8/JDK1.8 you can download ojdbc8 from here
http://www.oracle.com/technetwork/database/features/jdbc/jdbc-ucp-122-3110062.html
Update: For SQL Server use this thread
https://stackoverflow.com/questions/5307048/where-do-i-install-a-jdbc-driver-on-ubuntu
Step 3: Start the babel on port 6868
For SQL Server
java -Xmx1024m -cp "babel.jar:sqljdbc42.jar" de.skelton.babel.Babel 6868 com.microsoft.sqlserver.jdbc.SQLServerDriver


I want to compare the performance of Oracle vs KDB+, and in order to do that I have to duplicate the Oracle table in KDB+. I tried through ODBC layer but didn't work. Then I found another elegant solution posted on the code.kx.com site using Babel.
http://code.kx.com/wiki/Babel
"Babel for kdb+ is a SQL gateway process that allows kdb+ to query other vendors databases via jdbc."
Babel act as a broker between KDB+ and any database that can be connected through JDBC library. Meaning KDB knows how to talk to Babel and Babel knows how to talk to Databases through JDBC Layer. Now lets get into details.
Step 1:
Download Babel: wget https://github.com/CharlesSkelton/babel/raw/master/dist/babel.zip
and unzip it.
Step 2:
Download ojdbc7.jar from oracle and copy it to bin directory under Babel. Note: odbc7 is for JDK 1.7 and if your Java version (java -version) is 1.6 you should use odbc6.jar.
http://www.oracle.com/technetwork/database/features/jdbc/default-2280470.html
Update: If you are using Java 8/JDK1.8 you can download ojdbc8 from here
http://www.oracle.com/technetwork/database/features/jdbc/jdbc-ucp-122-3110062.html
Update: For SQL Server use this thread
https://stackoverflow.com/questions/5307048/where-do-i-install-a-jdbc-driver-on-ubuntu
Step 3: Start the babel on port 6868
$ java -Xmx1024m -Doracle.jdbc.defaultRowPrefetch=10000 -cp "babel.jar:lib/ojdbc7.jar" de.skelton.babel.Babel 6868 oracle.jdbc.OracleDriver
For SQL Server
java -Xmx1024m -cp "babel.jar:sqljdbc42.jar" de.skelton.babel.Babel 6868 com.microsoft.sqlserver.jdbc.SQLServerDriver
Step 4:
Start q (I assume you already have working instance of q). If not you should first learn about q from http://code.kx.com
q)h:hopen 6868
q)r:h("query";"jdbc:oracle:thin:scott/tiger@your_oracle_server:1521:orcl";"select * from emp");
PS: You know Scott/Tiger is user id/ password and ORCL is the Oracle instance.
More References:
KDB$: http://code.kx.com/
Oracle JDBC Driver: (ojdbc7.jar): http://www.oracle.com/technetwork/database/features/jdbc/default-2280470.html
JDBC Wiki: http://www.orafaq.com/wiki/JDBC
Thursday, October 23, 2014
Extracting Image meta data using Oracle ORDSYS.Image
Let's say you have a table "PICTURE" has a blob column "PIC_BLOB" which contains some image and you want to extract the meta data of the image, here is the query,
Don't ask me any more questions. I spilt my hair to get it working.
PS: If you are asking me why did I do it. Because Photos taken with iPhone are rotated randomly and learned that, rotation angle is stored in the meta data
select VALUE(xml_type).getstringval()
FROM table(
select ORDSYS.ORDImage.getMetadata(
ordsys.ordimage(ordsys.ordsource( PIC_BLOB, null, null, null, null, 1),null, null, null, null, null, null, null)
)
from PICTURE WHERE ID=1
)xml_type
Your Output will be something like this.
<ordImageAttributes xmlns="http://xmlns.oracle.com/ord/meta/ordimage" xmlns:xsi="http://www.w3.org/2001/XMLSchema-instance" xsi:schemaLocation="http://xmlns.oracle.com/ord/meta/ordimage http://xmlns.oracle.com/ord/meta/ordimage"></ordImageAttributes>
<iptcMetadata xmlns="http://xmlns.oracle.com/ord/meta/iptc" xsi:schemaLocation="http://xmlns.oracle.com/ord/meta/iptc http://xmlns.oracle.com/ord/meta/iptc" xmlns:xsi="http://www.w3.org/2001/XMLSchema-instance"/>
<exifMetadata xmlns="http://xmlns.oracle.com/ord/meta/exif" xsi:schemaLocation="http://xmlns.oracle.com/ord/meta/exif http://xmlns.oracle.com/ord/meta/exif" xmlns:xsi="http://www.w3.org/2001/XMLSchema-instance">
<TiffIfd>
<Orientation tag="274">top left</Orientation> -- This is what I am interested in
</TiffIfd>
<ExifIfd tag="34665">
<ColorSpace tag="40961">sRGB</ColorSpace>
<PixelXDimension tag="40962">3264</PixelXDimension>
<PixelYDimension tag="40963">2448</PixelYDimension>
</ExifIfd>
</exifMetadata>
Tip:If you are just interested in Orientation tag then apply Regular Expression like this
replace
VALUE(xml_type).getstringval()
with
max(REGEXP_SUBSTR(
VALUE(xml_type).getStringval(),'<Orientation (.*)>(.*)</Orientation>',1,1,'i',2))
Don't ask me any more questions. I spilt my hair to get it working.
PS: If you are asking me why did I do it. Because Photos taken with iPhone are rotated randomly and learned that, rotation angle is stored in the meta data
select VALUE(xml_type).getstringval()
FROM table(
select ORDSYS.ORDImage.getMetadata(
ordsys.ordimage(ordsys.ordsource( PIC_BLOB, null, null, null, null, 1),null, null, null, null, null, null, null)
)
from PICTURE WHERE ID=1
)xml_type
Your Output will be something like this.
<ordImageAttributes xmlns="http://xmlns.oracle.com/ord/meta/ordimage" xmlns:xsi="http://www.w3.org/2001/XMLSchema-instance" xsi:schemaLocation="http://xmlns.oracle.com/ord/meta/ordimage http://xmlns.oracle.com/ord/meta/ordimage"></ordImageAttributes>
<iptcMetadata xmlns="http://xmlns.oracle.com/ord/meta/iptc" xsi:schemaLocation="http://xmlns.oracle.com/ord/meta/iptc http://xmlns.oracle.com/ord/meta/iptc" xmlns:xsi="http://www.w3.org/2001/XMLSchema-instance"/>
<exifMetadata xmlns="http://xmlns.oracle.com/ord/meta/exif" xsi:schemaLocation="http://xmlns.oracle.com/ord/meta/exif http://xmlns.oracle.com/ord/meta/exif" xmlns:xsi="http://www.w3.org/2001/XMLSchema-instance">
<TiffIfd>
<Orientation tag="274">top left</Orientation> -- This is what I am interested in
</TiffIfd>
<ExifIfd tag="34665">
<ColorSpace tag="40961">sRGB</ColorSpace>
<PixelXDimension tag="40962">3264</PixelXDimension>
<PixelYDimension tag="40963">2448</PixelYDimension>
</ExifIfd>
</exifMetadata>
Tip:If you are just interested in Orientation tag then apply Regular Expression like this
replace
VALUE(xml_type).getstringval()
with
max(REGEXP_SUBSTR(
VALUE(xml_type).getStringval(),'<Orientation (.*)>(.*)</Orientation>',1,1,'i',2))
Sunday, February 9, 2014
Setting up automatic Wireless Connection for Raspberry Pi
Well, like many others I also bought Raspberry pi (I think a year ago) but didn't do much with it. I decided to do a Garage door opener project and bought Relay & USB Wireless adapter (http://www.amazon.com/gp/product/B003MTTJOY/ $9.99). I started fresh with Rpi new install from http://www.raspberrypi.org/downloads and used "NOOBS (offline and network install)" to install Raspbian OS. Then enabled remote SSH so that I can connect to it from my Mac and I can use the USP ports for attaching Wireless receiver. I have used tightvncserver & tightvnc viewer java client to RDP into Rpi.
From there launch "WiFi Config", and select "scan".

It will list all available networks and from that select your network and "Double Click" on it. It will bring another window with settings preselected, you just need to enter the password and hit "add"

This will automatically save your wireless network profile to "/etc/wpa_supplicant/wpa_supplicant.conf" file.
You can as well list the contents using
$sudo cat /etc/wpa_supplicant/wpa_supplicant.conf
--------------------------------------------------
pi@raspberrypi ~ $ sudo cat /etc/wpa_supplicant/wpa_supplicant.conf
ctrl_interface=DIR=/var/run/wpa_supplicant GROUP=netdev
update_config=1
network={
ssid="Your SSID Name"
psk="Your SSID Password"
proto=RSN
key_mgmt=WPA-PSK
pairwise=CCMP
auth_alg=OPEN
}
At this time, you can unplug your ethernet cable and still you will be able to access internet through wifi adapter. However if you restart your Rpi, your Wifi connection will not start automatically.
Follow the steps below to enable the wireless connection to startup automatically.
Note: You can't edit interfaces file directly since it is owned by root. You have to use sudo for the same
Either use nano or vi editor to match the content similar to mine
pi@raspberrypi ~ $sudo nano /etc/network/interfaces
or
pi@raspberrypi ~ $sudo vi /etc/network/interfaces
-------------------------------------------------------------------------
auto wlan0
iface lo inet loopback
iface eth0 inet dhcp
allow-hotplug wlan0
iface wlan0 inet dhcp
wpa-conf /etc/wpa_supplicant/wpa_supplicant.conf
iface default inet dhcp
-------------------------------------------------------------------------
Next edit wpa_supplicant.conf in the sameway
pi@raspberrypi ~ $sudo nano /etc/wpa_supplicant/wpa_supplicant.conf
or
pi@raspberrypi ~ $sudo vi /etc/wpa_supplicant/wpa_supplicant.conf
-------------------------------------------------------------------------
-------------------------------------------------------------------------
From there launch "WiFi Config", and select "scan".
It will list all available networks and from that select your network and "Double Click" on it. It will bring another window with settings preselected, you just need to enter the password and hit "add"
This will automatically save your wireless network profile to "/etc/wpa_supplicant/wpa_supplicant.conf" file.
You can as well list the contents using
$sudo cat /etc/wpa_supplicant/wpa_supplicant.conf
--------------------------------------------------
pi@raspberrypi ~ $ sudo cat /etc/wpa_supplicant/wpa_supplicant.conf
ctrl_interface=DIR=/var/run/wpa_supplicant GROUP=netdev
update_config=1
network={
ssid="Your SSID Name"
psk="Your SSID Password"
proto=RSN
key_mgmt=WPA-PSK
pairwise=CCMP
auth_alg=OPEN
}
-------------------------------------------------------------------
At this time, you can unplug your ethernet cable and still you will be able to access internet through wifi adapter. However if you restart your Rpi, your Wifi connection will not start automatically.
Follow the steps below to enable the wireless connection to startup automatically.
Note: You can't edit interfaces file directly since it is owned by root. You have to use sudo for the same
Either use nano or vi editor to match the content similar to mine
pi@raspberrypi ~ $sudo nano /etc/network/interfaces
or
pi@raspberrypi ~ $sudo vi /etc/network/interfaces
-------------------------------------------------------------------------
auto wlan0
iface lo inet loopback
iface eth0 inet dhcp
allow-hotplug wlan0
iface wlan0 inet dhcp
wpa-conf /etc/wpa_supplicant/wpa_supplicant.conf
iface default inet dhcp
-------------------------------------------------------------------------
Next edit wpa_supplicant.conf in the sameway
pi@raspberrypi ~ $sudo nano /etc/wpa_supplicant/wpa_supplicant.conf
or
pi@raspberrypi ~ $sudo vi /etc/wpa_supplicant/wpa_supplicant.conf
-------------------------------------------------------------------------
ctrl_interface=DIR=/var/run/wpa_supplicant GROUP=netdev
update_config=1
network={
ssid="Your Network SSID"
psk="Your Network Password"
proto=RSN
key_mgmt=WPA-PSK
pairwise=CCMP
auth_alg=OPEN
}
Note: proto, keymgmt can be different based upon your network security.
You can use the following blog for that reference, it's kind of the same blog, but didn't work for me.
Now you can restart your pi and enjoy it.
PS: I have used the following blog to setup my wifi, but neither did work.
Hence wrote this blog to show what worked for me.
Wednesday, December 4, 2013
Geo Coding address from Oracle
Have you ever dreamed about Geo Coding an address using Google Geo Location services through Oracle, your dream has come true.
WITH GEOCODE AS(
SELECT UTL_HTTP.REQUEST('http://maps.googleapis.com/maps/api/geocode/xml?address='|| replace('1 Main St,Trumbull,CT-06611',' ','+') || '&sensor=false') GEO_XML
FROM DUAL
)
SELECT EXTRACTVALUE(XMLTYPE(GEO_XML),'/GeocodeResponse/status') STATUS
, EXTRACTVALUE(XMLTYPE(GEO_XML),'/GeocodeResponse/result[position()=1]/geometry/location/lat') LATITUDE
, EXTRACTVALUE(XMLTYPE(GEO_XML),'/GeocodeResponse/result[position()=1]/geometry/location/lng') LONGITUDE
, GEO_XML
FROM GEOCODE
WHERE EXTRACTVALUE(XMLTYPE(GEO_XML),'/GeocodeResponse/status') = 'OK'
WITH GEOCODE AS(
SELECT UTL_HTTP.REQUEST('http://maps.googleapis.com/maps/api/geocode/xml?address='|| replace('1 Main St,Trumbull,CT-06611',' ','+') || '&sensor=false') GEO_XML
FROM DUAL
)
SELECT EXTRACTVALUE(XMLTYPE(GEO_XML),'/GeocodeResponse/status') STATUS
, EXTRACTVALUE(XMLTYPE(GEO_XML),'/GeocodeResponse/result[position()=1]/geometry/location/lat') LATITUDE
, EXTRACTVALUE(XMLTYPE(GEO_XML),'/GeocodeResponse/result[position()=1]/geometry/location/lng') LONGITUDE
, GEO_XML
FROM GEOCODE
WHERE EXTRACTVALUE(XMLTYPE(GEO_XML),'/GeocodeResponse/status') = 'OK'
Warning 1: You have to substitute spaces with '+' in the address, otherwise the request will fail.
Warning 2: Some time Google may return bigger XML, however UTL_HTTP.REQUEST will return only the first 2000 characters and it will thrown an error. To over come this issue, replace UTL_HTTP.REQUEST with my dirty version of Oracle CURL function(See my prior blog)
Warning 3: Read the licensing requirements before using Google geocoding services, you might need an business license to use this service.
Warning 3: Read the licensing requirements before using Google geocoding services, you might need an business license to use this service.
CURL implementation in Oracle
Have you ever wondered, you wish you had an Oracle CURL function, no problem, your wish is fulfilled.
PS: This will only work for text files and you can one for binary files too.
CREATE OR REPLACE FUNCTION CURL(i_URL VARCHAR2) RETURN CLOB IS
-- HTTP Portion
l_http_request UTL_HTTP.req;
l_http_response UTL_HTTP.resp;
l_clob CLOB;
l_text VARCHAR2(32767);
BEGIN
-- Initialize the CLOB.
DBMS_LOB.createtemporary(l_clob, FALSE);
-- Make a HTTP request and get the response.
l_http_request := UTL_HTTP.begin_request(i_URL);
l_http_response := UTL_HTTP.get_response(l_http_request);
-- Copy the response into the CLOB.
BEGIN
LOOP
UTL_HTTP.read_text(l_http_response, l_text, 32766);
DBMS_LOB.writeappend (l_clob, LENGTH(l_text), l_text);
END LOOP;
EXCEPTION WHEN UTL_HTTP.end_of_body THEN
NULL;
END;
UTL_HTTP.END_RESPONSE(l_http_response);
RETURN l_clob;
END CURL;
/
PS: This will only work for text files and you can one for binary files too.
CREATE OR REPLACE FUNCTION CURL(i_URL VARCHAR2) RETURN CLOB IS
-- HTTP Portion
l_http_request UTL_HTTP.req;
l_http_response UTL_HTTP.resp;
l_clob CLOB;
l_text VARCHAR2(32767);
BEGIN
-- Initialize the CLOB.
DBMS_LOB.createtemporary(l_clob, FALSE);
-- Make a HTTP request and get the response.
l_http_request := UTL_HTTP.begin_request(i_URL);
l_http_response := UTL_HTTP.get_response(l_http_request);
-- Copy the response into the CLOB.
BEGIN
LOOP
UTL_HTTP.read_text(l_http_response, l_text, 32766);
DBMS_LOB.writeappend (l_clob, LENGTH(l_text), l_text);
END LOOP;
EXCEPTION WHEN UTL_HTTP.end_of_body THEN
NULL;
END;
UTL_HTTP.END_RESPONSE(l_http_response);
RETURN l_clob;
END CURL;
/
Thursday, June 13, 2013
Spooling output in SQL PLUS
I am not a big fan of SQLPLUS, typically use GUI tools to access Database. If you happen to use SQLPLUS for spooling output/cretaing file out of SQL Query to a file, here is the code snippet
set echo off;
set linesize 600
set newpage 0
set trimspool off
set heading off;
set tab off;
set serveroutput off;
set termout off;
spool
output_file.dat;
< SQL GOES HERE>;
spool
off;
quit;
Monday, February 25, 2013
Mac Security-Running selected external applications
Mac Mountain lion has a new security feature(actually lot of features) which prevents running apps downloaded outside of Mac app store. If you try to run those apps you will get a warning something like this. For example, I have downloaded SQL Developer from Oracle.


When ever this happens everyone will Google it and look for a solution to disable this feature. I did the same thing but stumbled upon a new way of running those apps without changing the default security setting. Thanks to http://www.intego.com/mac-security-blog/new-security-features-in-os-x-mountain-lion/ You just need to hold "Control" key, right click on the app and select "Open. This time you will get a slightly different warning. Select Open and you need to enter Admin credentials to make it effective. That's it. Now you can open SQL Developer and it won't bother you again with that security message.


Tuesday, January 15, 2013
Why Windows 7 is better than Windows 8
In other words, why Fidelity Windows 7 gadget is better than Windows 8 finance app with Live tiles.
Dow Jones index is shown in red which kind of indicates it's down in Fidelity app.

What's the point in having live tile, if it can't paint the picture using proper color. Why is it in green when the index is down in Windows 8.

Dow Jones index is shown in red which kind of indicates it's down in Fidelity app.
Thursday, January 10, 2013
Mapping multiple schemas to Apex Workspace
Unfortunately Apex Admin application doesn't let you map more than one schema to the workspace. However I had a requirement to map 500 schema's to one single workspace (For the creation of training application for 500 Users). APEX_INSTANCE_ADMIN package came in handy and I did it using PL SQL.
Here is how you do it.
SQL> APEX_INSTANCE_ADMIN.ADD_SCHEMA(
p_workspace => 'MY_WORKSPACE', p_schema => 'MY_SCHEMA');
PS: You can use the same package REMOVE_SCHEMA to remove the mapping as well. Also SYS & SYSTEM schema's cannot be mapped using the same due to security restriction.
Reference to Oracle documentation: http://docs.oracle.com/cd/E37097_01/doc/doc.42/e35127/apex_instance.htm
Here is how you do it.
SQL> APEX_INSTANCE_ADMIN.ADD_SCHEMA(
p_workspace => 'MY_WORKSPACE', p_schema => 'MY_SCHEMA');
PS: You can use the same package REMOVE_SCHEMA to remove the mapping as well. Also SYS & SYSTEM schema's cannot be mapped using the same due to security restriction.
Reference to Oracle documentation: http://docs.oracle.com/cd/E37097_01/doc/doc.42/e35127/apex_instance.htm
Thursday, September 20, 2012
Get most out of your Wireless Router
I have Linksys E2500 (Cisco) router at home and Optimum is my ISP. It's a dual band router with Wireless N support and can server upto 300Mbps. I just left my Wireless Router settings to default other than just protecting my SSID. I don't abuse my ISP by downloading Gigs of data or by hosting bit torrent. Still I hardly get 10-15 Mbps download speed with my ISP.

I do have some basic understanding about Networking but never paid attention to it on my Router. I was just Googling to find ways to improve performance and I can't believe how effective you can make your router with some simple tweaks. I thought it is worth sharing and listed some of the tweaks I did on my Router. Again these are all specific to my Router Linksys E2500, however you can apply the same concepts on your Router.
Below is screenshot f my Wireless Router Setting.
#1: Switch to "Manual" configuration mode from Basic Wireless Setting (May be different for your Router)
#2: Use different SSID for 2.4 GHz & 5.0 GHz. If you keep the same name you have no idea which frequency your device is using. 5.0 is better than 2.4, however not all your device can connect to 5.0. For example iPhone 4 & 4S can connect to "Wireless N" only on 2.4 GHz. iPhone 5 can connect to "Wireless N" on both 2.4 GHz & 5.0 GHz. All iPads (Original, 2 & new) supports "Wireless N" on both 2.4 GHz & 5.0 GHz.
#3: If your Router supports "Wireless N" mode change the settings from "Mixed" to "Wireless N". iPhone 3G & 3GS doesn't support "Wireless N". If you still own one of these you should leave the Wireless mode to "Mixed" at least for 2.4 GHz. You can have different modes for 2.4 GHz & 5.0 GHz and that the reason you should use different SSID name.
Read "How to get the most out of your dual band router" from the PDF below. It has ton of information.
Also the following link describes the difference between a, b, g and n networks.
#4: Switch the devices that support 5.0 GHz/ Wireless N to the respective SSID to get the most out of it. In my case I switched to 5.0 GHz/Wireless N network on my laptop, Macbook pro, iPad.
#5: My manual suggests to use "WP2-Personal" security for "Wireless N" better performance.
Wednesday, September 19, 2012
iOS 6.0 is out
Go ahead and try it from your iPhone/iPad. It's not yet posted on the Apple website.
Excited with all the features of iOS 6.0 except Map. Sorry Apple, you screwed up Map.
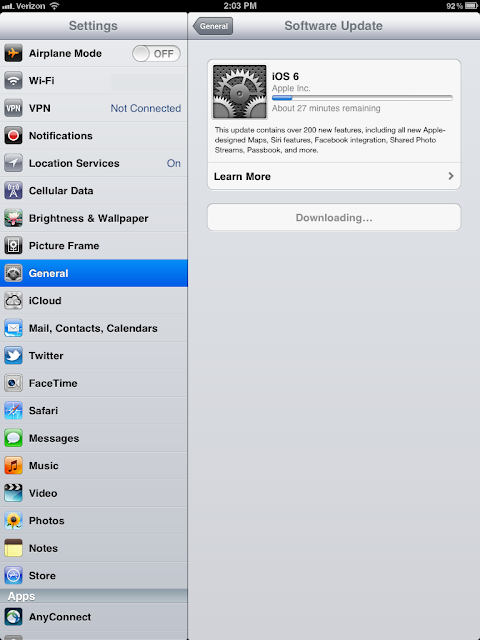

Excited with all the features of iOS 6.0 except Map. Sorry Apple, you screwed up Map.
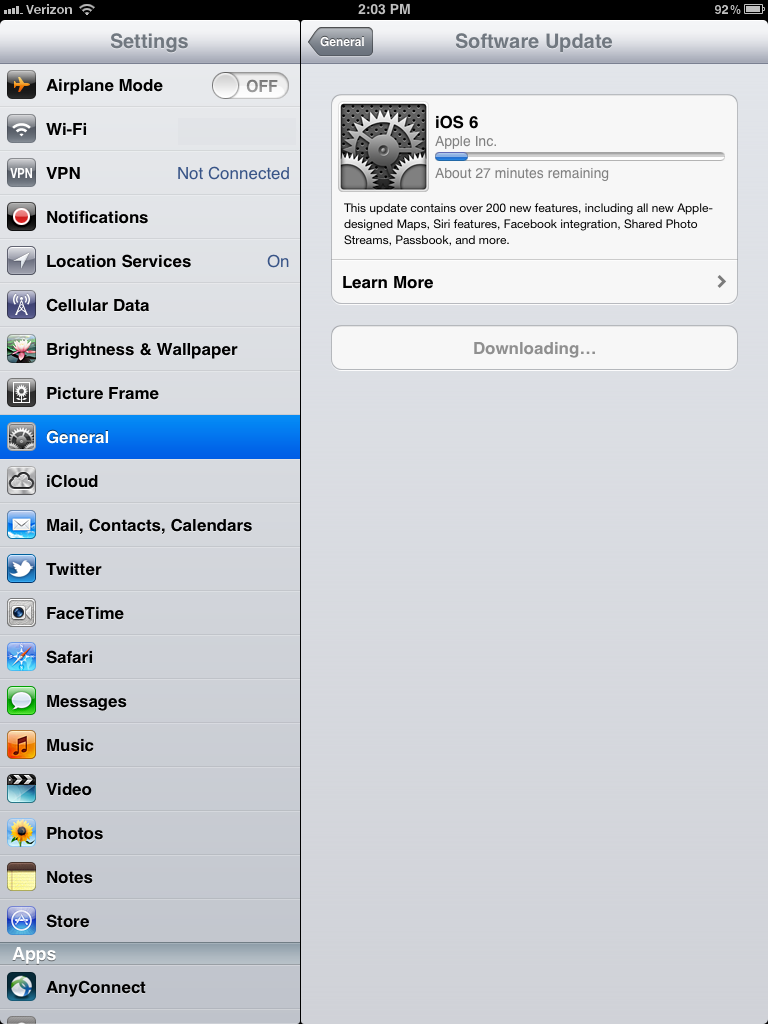
It took 30 minutes for my iPad 3G to update to iOS 6.0. Whats amazing is after the update, still my apps are in the same suspended state.

Subscribe to:
Posts (Atom)