Thursday, September 20, 2012

Get most out of your Wireless Router

I have Linksys E2500 (Cisco) router at home and Optimum is my ISP. It's a dual band  router with Wireless N support and can server upto 300Mbps. I just left my Wireless Router settings to default other than just protecting my SSID. I don't abuse my ISP by downloading Gigs of data or by hosting bit torrent. Still I hardly get 10-15 Mbps download speed with my ISP.

I do have some basic understanding about Networking but never paid attention to it on my Router. I was just Googling to find ways to improve performance and I can't believe how effective you can make your router with some simple tweaks. I thought it is worth sharing and listed some of the tweaks I did on my Router. Again these are all specific to my Router Linksys E2500, however you can apply the same concepts on your Router.
Below is screenshot f my Wireless Router Setting.


#1: Switch to "Manual" configuration mode from Basic Wireless Setting (May be different for your Router)

#2: Use different SSID for 2.4 GHz & 5.0 GHz. If you keep the same name you have no idea which frequency your device is using. 5.0 is better than 2.4, however not all your device can connect to 5.0. For example iPhone 4 & 4S can connect to "Wireless N" only on 2.4 GHz. iPhone 5 can connect to "Wireless N" on both 2.4 GHz & 5.0 GHz. All iPads (Original, 2 & new) supports "Wireless N" on both 2.4 GHz & 5.0 GHz.

#3: If your Router supports "Wireless N" mode change the settings from "Mixed" to "Wireless N". iPhone 3G & 3GS doesn't support "Wireless N". If you still own one of these you should leave the Wireless mode to "Mixed" at least for 2.4 GHz. You can have different modes for 2.4 GHz & 5.0 GHz and that the reason you should use different SSID name.

Read "How to get the most out of your dual band router" from the PDF below. It has ton of information.

Also the following link describes the difference between a, b, g and n networks.

#4: Switch the devices that support 5.0 GHz/ Wireless N to the respective SSID to get the most out of it. In my case I switched to 5.0 GHz/Wireless N network on my laptop, Macbook pro, iPad.

#5: My manual suggests to use "WP2-Personal" security for "Wireless N" better performance.

Wednesday, September 19, 2012

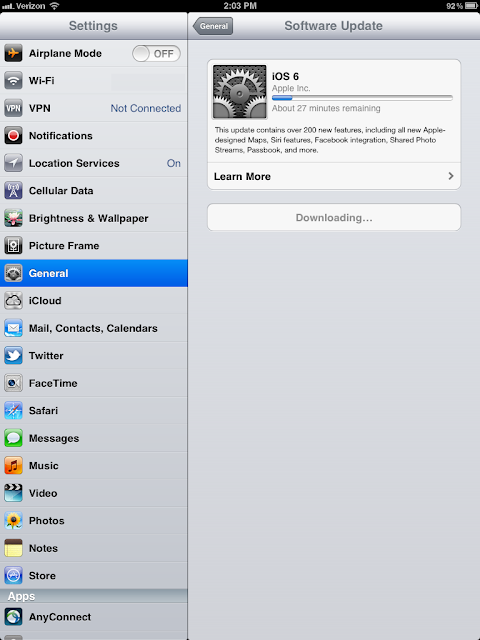
iOS 6.0 is out

Go ahead and try it from your iPhone/iPad. It's not yet posted on the Apple website.
Excited with all the features of iOS 6.0 except Map. Sorry Apple, you screwed up Map.

It took 30 minutes for my iPad 3G to update to iOS 6.0. Whats amazing is after the update, still my apps are  in the same suspended state.


Thursday, August 30, 2012

Apache Virtualhost URL Rewrite - Keys to Success

Have you ever tried to make Apache URL Rewrite to work at the Virtualhost level and felt like you are banging your head on the wall, don't think you are alone, I am with you.
After lots and lots of search,  read through documentation, trial and error, I  finally got it to work. This configuration will work with a Reverse Proxy Server in the front.  Also if Apache & Reverse Proxy Servers are listening in different port (Example Reverse Proxy on port 80 and Apache on port 8080), use the Apache listening port on your VirtualHost configuration.

Always start with  "Apache -S" (In some cases httpd -S) option. This will list all the issues found in httpd.conf file. Actually I found couple of issues with my httpd.conf file, in fact Apache was up and running with those issues and driving me crazy.

For the Jump Start just copy paste the following lines into to your https.conf file and JUST change the domain name.


NameVirtualHost *:80
<VirtualHost *:80>
ServerName mydomain.com
DocumentRoot "c:\www\mydomain.com"
# Following two lines are handy for debugging, but don't do it on your production machine
RewriteLog "C:\www\temp\rewrite.log"
RewriteLogLevel 9
RewriteEngine on
# Put all your ReWrite rules over here for mydomain.com
RewriteRule index.html$ welcome.html [NC,L]
</VirtualHost>
<VirtualHost *:80>
ServerName myotherdomain.com
DocumentRoot "c:\www\myotherdomain.com"
RewriteEngine on
# Put all your ReWrite rules over here for myotherdomain.com
RewriteRule index.html$ welcome.html [NC,L]
</VirtualHost>


Now lets talk about all the mistakes you can do (To be precise I did)

Mistake #0:
Trying to debug without running "Apache -S" (In some cases httpd -S) command. You must resolve all the issues listed by that command, before you start think about why is not working.

Mistake #1:
<VirtualHost *:80> element alone is not sufficient to trigger URL Rewrite and you need NameVirtualHost *:80 prior to that.

Mistake #2:
NameVirtualHost mydomain.com:80 is incorrect. Just go with *:80

Mistake #3:
What ever you put in after NameVirtualHost should be exactly repeated in every VirtualHost element.
Each server should be specified in ServerName attribute and not in VirtualHost
For example


NameVirtualHost *:80
<VirtualHost mydomain.com:80>
</VirtualHost>

<VirtualHost myotherdomain.com:80>
</VirtualHost>


is incorrect.
Correct way to do it is


NameVirtualHost *:80
<VirtualHost *:80>
ServerName mydomain.com
</VirtualHost>

<VirtualHost *:80>
ServerName myotherdomain.com
</VirtualHost>


Mistake #4:
No port to be specified in the ServerName
For example

<VirtualHost *:80>
ServerName mydomain.com:80
</VirtualHost>
is incorrect.

Right one is

<VirtualHost *:80>
ServerName mydomain.com
</VirtualHost>

Mistake #5:
All VirtualHost element must have at least ServerName  & DocumentRoot in it. I will add "ReWriteEngine On" to that.

For Example

RewriteEngine on  # Globally Turning it on has no impact on VirtualHost

<VirtualHost *:80>
ServerName mydomain.com
DocumentRoot "c:\www\mydomain.com"
RewriteRule index.html$ welcome.html [NC,L]
</VirtualHost>


won't do any URL ReWrite.
Instead you must put that in inside the VirtualHost


<VirtualHost *:80>
ServerName mydomain.com
DocumentRoot "c:\www\mydomain.com"
RewriteEngine on  # You need it here.
RewriteRule index.html$ welcome.html [NC,L]
</VirtualHost>

Mistake #6:
This may sound sillly, but I am sure someone will do it.
Putting  "."(dot) instead of ":" (colon) between * and 80.
*.80 is incorrect
*:80 is correct.
This may happen especially if you use IP address instead of star.


Still reading my blog, ok then, let me drive you crazy.
Lets talk about Apache listening on multiple ports and settingup VirtualHosts.

Lets say your Apache is listening on Port 80 as well as 8080 and want to setup Virtual host.
Here is the right way to do it.

NameVirtualHost *:80
NameVirtualHost *:8080

<VirtualHost *:80 *:8080>
ServerName mydomain.com
DocumentRoot "c:\www\mydomain.com"
RewriteEngine on  # You need it here.
RewriteRule index.html$ welcome.html [NC,L]
</VirtualHost>

NameVirtualHost *:80 *:8080  #  IS INCORRECT

Well it took two days for me solve this problem. I would really appreciate if you drop a comment, whether it was helpful solving your problem or not. Especially if you can mention the Mistake # that would be great, of course you can be anonymous.



Friday, August 24, 2012

CheatSheet for Apache & Regular Expression ...

I happened to stumble on this site while trying to figure out Apache Mod_Rewrite to work.
http://www.addedbytes.com/cheat-sheets/
This site has Cheet Sheets for Apache, Regular Expressions, CSS, Javascript , you name it, he got it.

Thank you Dave.

Tuesday, August 21, 2012

#AlertBot -Didn't you learn your lessons

Didn't your learn your lessons from the past "test" email you have sent to all your customers. You may be great at monitoring Website. You better Monitor your email as well.
On Aug 14, I got a marketing email with subject "Test".

I got one more today (Aug 21st) with the right subject but for the event already occurred on Aug 14th?
This is the first time I am getting an invitation one week after event :)


Tuesday, August 14, 2012

Creating shortcut for a network folder in Mac

*** Read my Update 2 at the bottom of this post for a quick solution. ***

Being Windows User for a long time, it was always easy to create a short cut in Windows using "Ctrl" + "Shift" drag of a folder to Desktop. ("Ctrl" Drag folder Copies the Folder and "Shift" drag moves the folder, in case if you don't know).
In Mac if you drag a folder to Desktop it copies it and if you hold "Apple" key while dragging it moves it. Other way to create a shortcut is to right click and choose "Make Alias". It creates the shortcut in the same folder and then you can move it to the right place.

However if you want to create a shortcut for a network share, for example smb://server_name/shared_folder it was impossible because you may not have right access at smb://server_name level. I found a trick to create a shortcut for network folder using "ln" command. For those of you who don't know, when you access a network share using smb://server/folder, mac automatically mount it under /Volumes/folder(Note: No server name over here). Just open up terminal window and switch to Desktop folder.
Just type this magic command to create a shortcut
$ ln -s /Volumes/<network_folder_name> <Your Shortcut Name>
PS: "ln" stands for link and "ln -s" is for creating "Symbolic Link", fancy name for shortcut in Unix world.

Update1: Found one more option through Google. You can have Mac place the shortcut for all connected Servers in Desktop by checking the option "Connected Serveres" from Finder Preference option. However this will create the link for the Server and not the specific folder you are interested in.
Update 2: Actually if you hold "Command/Apple" + "Option" key while dragging folder to the desktop it creates the shortcut. Just drag the folder to the Desktop while holding the above two keys from /Volumes/folder_name location.

Thursday, August 9, 2012

Customizing Tomcat access log

By default Tomcat logs every web request it receives in $TOMCAT_HOME/logs folder in a file called  "localhost_access_log<Date>.txt" and it does creates one log file for every day.
By default it captures the request IP address, time of the request, bytes sent, status of request etc.
If you want to change it, for example let say you are using an reverse proxy server and wants to log the actual client IP address present in "X-Forwarded-For" then you need to specify the same in $TOMCAT_HOME/config/server.xml file.

Look for the Valve element and additional parameters you want to capture to the pattern element. You can as well configure log file name, location over here.


        <Valve className="org.apache.catalina.valves.AccessLogValve" directory="logs"
               prefix="localhost_access_log." suffix=".txt"
               pattern="%a %{X-Forwarded-For}i %T %t  %s %b" />


For more configuration options refer to Tomcat Documentation. http://tomcat.apache.org/tomcat-7.0-doc/config/valve.html

For your quick reference(From Apache Documentation mentioned above).


Values for the pattern attribute are made up of literal text strings, combined with pattern identifiers prefixed by the "%" character to cause replacement by the corresponding variable value from the current request and response. The following pattern codes are supported:
  • %a - Remote IP address
  • %A - Local IP address
  • %b - Bytes sent, excluding HTTP headers, or '-' if zero
  • %B - Bytes sent, excluding HTTP headers
  • %h - Remote host name (or IP address if enableLookups for the connector is false)
  • %H - Request protocol
  • %l - Remote logical username from identd (always returns '-')
  • %m - Request method (GET, POST, etc.)
  • %p - Local port on which this request was received
  • %q - Query string (prepended with a '?' if it exists)
  • %r - First line of the request (method and request URI)
  • %s - HTTP status code of the response
  • %S - User session ID
  • %t - Date and time, in Common Log Format
  • %u - Remote user that was authenticated (if any), else '-'
  • %U - Requested URL path
  • %v - Local server name
  • %D - Time taken to process the request, in millis
  • %T - Time taken to process the request, in seconds
  • %I - Current request thread name (can compare later with stacktraces)
There is also support to write information incoming or outgoing headers, cookies, session or request attributes and special timestamp formats. It is modeled after the Apache HTTP Serverlog configuration syntax:
  • %{xxx}i for incoming headers
  • %{xxx}o for outgoing response headers
  • %{xxx}c for a specific cookie
  • %{xxx}r xxx is an attribute in the ServletRequest
  • %{xxx}s xxx is an attribute in the HttpSession
  • %{xxx}t xxx is an enhanced SimpleDateFormat pattern

Sunday, August 5, 2012

Apex Listener - Connecting to multiple databases

Warning: This will become obsolete when Kris Rice releases Apex Listener 2.0. Already Apex Listener EA1 is out.

I have already blogged about Installing Apex Listener on Tomcat and Managing Apex Listener.

If you have already installed Apex Listener 1.1 or temporarily want to connect to multiple databases then you can follow the steps.

1. Decide on the deployment name. Default one is /apex/. Select another one like /testdb/. Once you decide on the deployment name, goto <Tomcat Home>/webapps folder on your PC/Linux VM etc. and copy apex.war to testdb.war.

2. Configure the new Database Connection by accessing http://localhost:8080/testdb/listenerConfigure
Tomcat will automatically extract testdb.war content and will create testdb folder inside webapps.
Then it will give you a surprise and will say
"The APEX Listener is already configured. Please login as Administrator to access APEX Listener Administration." Let's fix it.


3. Open up <Tomcat Home>/webapps/testdb/WEB-INF/web.xml and configure "config.dir" as follows.

<context-param>
<param-name>config.dir</param-name>
<param-value><Your Tomcat Home>/webapps/testdb</param-value>
</context-param>
Use the full path of your Tomcat Home and never tried relative path. testdb is your deployment folder.

4. Now restart your Tomcat and access the following URL to configure to your new database instance.
http://localhost:8080/testdb/listenerConfigure. Once deployed you can access your database applications using http://localhost:8080/testdb/f?p=<app>:<page>

PS: After deploying 4 or 5 apex war files I started to get "OutOfMemory" exception in TomCat. I have put in the following code in Tomcat startup.sh/startup.bat (Present under <tomcat Home>/bin folder) to address the issue temporarily. Please post a comment if you have better fix.

# To avoid Out of Memory error
export JVM_ARGS="-Xmx1024m -XX:MaxPermSize=256m";
export CATALINA_OPTS="-Xms1024m -Xmx1024m -XX:PermSize=128m -XX:MaxPermSize=512m";


Thursday, August 2, 2012

Lost VSS Admin Password. No Problem

It's not new in IT environment, hearing from VSS Admin, Oops I don't remember the Admin password or I thought you guys migrated to Github etc., Well if that doesn't happened to you you are lucky, in my case I am not. I wanted to add some useres but couldn't be able to do it because no one knows the Admin Password. I was the only one using VSS, however it doesn't ask for the password since the VSS user name is same as my network user account. I thought I can try the same for Admin as well.
So I created account called "Admin" (Not Administrator) on my local machine, no special privilege is required. I had a local VSS client installed on my server. I went there and launched "SSADMIN.EXE" as my localhost\Admin user. You just need to "Shift" + Right Click on the file and select "Run as different User".  It automatically connected to my local VSS as Admin without asking for password. From there I have connected to my actual network VSS database(From Users-> Open Source Database) . It asked for my network user account to connect to the share since I was running it as localhost Admin. As soon as I entered my network credentials, I have connected to my network VSS database (For which I don't have the Admin password, to be precise,  our VSS admin memory block that stored the password got corrupted).
That's it I have added new Useres, granted full access to me and did everything except changing the Admin password, because it was asking for the old password. But who cares, I got what I want and if necessary, I will use the same hack one more time.

PS: This will work only when you have "Use network name for automatic login" checked.


Tag: Recover VSS Admin Password, Lost VSS Admin Password, Reset VSS Admin Password

Wednesday, August 1, 2012

Dealing with Files present in network share from SQL Developer

I have recently switched to Mac from PC and wish I could have had Mac version of TOAD. I have used TOAD for about 10 years and switching to SQL Developer is hard for me. One of the problem that I had with SQL Developer was accessing files present in the network share. Unfortunately you can't open file from SQL Developer using smb://share_name/folder syntax. I was so lucky to meet with Kris Rice @krisrice (Oh yah, the developer of SQL Developer) in ODTUG #kscope12 conference. He showed me how to do it. Looks like Mac automatically mounts the folders you access using smb://network_share under /Volumes/network_share. You just need to browse to this location and can start accessing your network share as a local drive.
Thanks Kris for this Tip.

Friday, July 20, 2012

Working with PC from Mac

"Microsoft should be proud of Apple since Apple makes the best hardware to run Windows"

I recently switched to Mac from PC thinking I will use Mac Windows RDP client to connect to Windows as my fallback option. However mac RDP experience is drastically different from windows, at the same time I don't want to go back to Windows. After lot of Googling I found the ways to get Windows experience from Mac. However I did not find a solution to map apple/command key to Windos key.

** First install CheatSheet. It's a wonderful tool displays the application sensitive shortcuts when you hold the Apple key for couple of seconds. No need to memorize all the shortcuts to begin with however I would recommend doing it.
http://www.cheatsheetapp.com/CheatSheet/

** Then start with installing mac RDC client 2.1
http://www.microsoft.com/mac/remote-desktop-client

** Launch RDC client and connect to your favorite windows machine.
** Apple  Key + 2 to goto fullscreen windows mode and come back.
** Access RDC preference menu using Apple + "," or through RDC-> Preferences.
     Goto Display and select "Fullscreen"as your Remote Desktop Size
     From Drives you can open up your Mac drives to be accessible from Windows machine. Oh ya, you  can edit your mac files from your favorite windows editor.

** Key board mapping
Windows ==> Apple equivalent
Backspace ==> Delete
Delete ==> Fn + Delete
http://support.microsoft.com/kb/970299

Time to switch to MAC

I used to be a big fan of Windows since Windows 95 and I was the only one kept my pilot Windows Vista machine as my primary workstation for couple of years in my corporate environment without any support. I loved Windows 7 since it was launched as beta and have no problem working with that. I am split on Windows 8. I think it is too much for a normal Windows User to get comfortable with Windows 8. I like the Apple concept of keeping the Mobile devices including iPad for consuming web and using Macbook for the creating content. Now I am seriously thinking about ditching my PC for my Macbook Air. I had a Macbook Air for the past several months, however hardly used it since the experience is completely different and I did not get myself comfortable with the Mac environment. Every time I used my Mac, one thing attracted me, the performance and quality of hardware. I can't complain much about my PC hardware, it has Sold State Hard Drive, 4 Gig Ram, Windows 7 64bit enterprise, Intel core 2 duo processor, boots less than a minute etc, etc. However most of time 50% of my Windows PC resources consumes by the Antivirus security software, application monitor software, data protection software etc.,. Oh, not to mention, my Windows PC can read my mind. Whenever I am working on some important report, Windows as well accompany me by running its most important tasks like indexing service, Disk keeper etc. Some times Antivirus software as well joins the party by running everyday full system scan at the same time.
I do have antivirus, data protection software on my Mac, however I never felt the poor performance in it. Most of the time I sit on Chrome to support my web applications. Chrome on Windows got worst it crashes most of the time and takes about 30 seconds to launch. In Mac it takes lightening 2 seconds to launch. Not to mention, it takes about seconds to resume from sleep mode and automatically reconnects my VPN to my corporate network. I love two finger scrolling, three finger app switch, four and five finger gestures.  After working both PC & Mac, I think its time for me to switch to Mac permanently. Sure I will miss my Windows apps like TOAD, VSS, EditPlus. It's just a matter of getting myself comfortable with SQL Developer, TextMate..

PS: I wrote this blog on my Mac.

Wednesday, June 27, 2012

I have been honored

Thank you John Scott(@aejes) : I enjoyed your web socket session and that's the best session I ever attended in #ODTUG.

Monday, May 14, 2012

Apex 4.1 + RESULT_CACHE_MODE (FORCE) = Apex Bug

After banging my head with my Apex 4.1 upgraded laptop for a month, I finally invented the above equation.
Wondering what it means and how I found it, then you need to read the whole (real) story.
I was trying to upgrade my Apex 4.0 laptop to Apex 4.1 and after the upgrade everything seems to be fine. However when I tried to import an application, this is how my "File Character Set" drop down looked.


However I know some of my Post Apex upgrade steps are the one causing this error and I could not be able to believe the following statement is what actually causing this error/bug.

SQL> ALTER SYSTEM SET RESULT_CACHE_MODE = 'FORCE'     SCOPE = BOTH;

After changing this back to System Default which is MANUAL, I got my File Character Set back.

SQL> ALTER SYSTEM SET RESULT_CACHE_MODE = 'MANUAL'     SCOPE = BOTH;

Now my Application import screen looks like this.

Please check your  RESULT_CACHE_MODE settings on your Database server especially if you use Apex 4.1.

I have been using RESULT_CACHE_MODE = 'FORCE' with Apex 4.0 and I never had issues with that.

Please leave a comment if you are experiencing the same issue.

Monday, April 16, 2012

Unix commands for Windows Users

I am not a great fan of Unix CUI and I prefer X-Windows to work with. I already blogged about enabling VNC Server for Linux.
However if you talk to Unix admins they are so passionate about Unix CUI and the power of Unix Scripting language,  I don't disagree either.
I would strongly suggest reading some of the Unix books to unlock the full potential of Unix. If you occasionally login to Unix (like me) here are few of the commands you can use.


  • Secure Copy (scp). This command is useful if you want to copy file from one server to other.
  • Update: Use rsync (given below)instead of scp
$scp foo.txt  user@<destination server>:<destination folder/>foo.txt
if you want to copy entire directory
$scp -r foo user@<destination server>:foo

if you also wants to preserve file timestamp, so that it doesn't look like all the files are recently created / modified in the destination server use -p
$scp -r -p foo user@<destination server>:foo
  • Soft Links. This is similar to windows shortcuts, however from the file system perspective it will look like a read directory. Even though you are creating a shortcut, you still need to have read access to the folder.
ln -s <destination folder name> <linkname>
  • which - Helps you find the location of the file you will execute when you type the name from the command prompt. This will become handy especially when you have multiple version of same program (Like java) and you have no idea which one is being executed.
$which java
  • Taking a peek at running processes
$ps -ef

  • Unix has multiple utilities to automate tasks. I think most famous ones are Cron & Autosys. It's  similar to Windows Task Scheduler, however there is no GUI. If you want to use crontab to schedule jobs here is the format.
Crontab
*     *     *   *    *      
|     |     |   |    |    +--- command to be executed
|     |     |   |    +------ day of week (0 - 6) (Sunday=0)
|     |     |   +--------- month (1 - 12)
|     |     +------------ day of month (1 - 31)
|     +---------------- hour (0 - 23)
+-------------------- min (0 - 59)

30 15 * * 1-5 /usr/bin/ksh <shell Script>   --> This will run your script at 3.30 PM, Mon-Fri.

$crontab -l --> Will list scheduled tasks
$crontab -e --> Will let you edit the task in VI Editor.


Finally if you don't know how to use a particular command, Unix has powerful built in help called man (stands for manual). That's your "F1" key for Unix.

Update: 11/22/13
rsync
This is most powerful and my most favorite command for synchronizing directories across multiple servers or the same machine.
Format: Please go through man rsync to take a quick at all available options.
Most common format:
rsync -avzh <source> <destination>
source or destination can be in any of the following format
/home/balaji/mydata  => mydata directory present locally
balaji@unix_server2:/home/balaji/mydata =>Connect to unix_server2 as balaji and synchronize my_data directory

For example if you want to synchronize mydata directory present under your home in unix_server1 with unix_server2 the command will look like.
Assuming you logged into unix_server1
[balaji@unix_server1 ~]$ rsync -avzh /home/balaji/mydata balaji@unix_server2:/home/balaji
Please note: you don't need to specify "mydata" again on the destination side and it will automatically create it. Also the above options retains the file modification time as well.

Now lets look at the options
a->archive (Included -rlptgoD)
r->recursive
l->copy symlinks as symlinks
p->preserve permissions
t->preserve modification times
v->verbose
z->Compress data during transfer
h->human readable
n-> Dry Run .. Nothing gets copied . It pretends as if it is copying but does nothing. Just add "n" to options if you not sure about your sync command.
Here is the nice part of it, if you run this command multiple times, it sends just the updated files since the last run and is super quick.


Directory size
To find the space left at the volume level us
$df - h
If you want to find the size of a directory for example, mydata then use
$du -skh /home/balaji/mydata

Sunday, April 15, 2012

Enabling VNC Server in Linux

Linux comes in lot of flavors and steps you need to follow to enable VNC Server may be slightly different. Google is your best friend.
Try these steps for Redhat and best of luck.

  • Review ~home/.vnc/xstartup file and you may have to uncomment first couple of lines to enable VNC Session manager

  • Start VNC by executing /usr/bin/vncserver command . For the first time, you need to setup a password to protect your VNC Session.
Stopping VNC
"ps -la" will list all user processes and you can find VNC processes and kill it using "kill -9 <VNC Process ID>"

Cleaning up VNC Files
rm ~home/.vnc/<hostname>*
rm /tmp/.X*lock
rm /tmp/.X11-unix

Thursday, March 8, 2012

Microsoft Excel 2010 Tips

I got this link from Microsoft promotional email and I am so happy I did not ignore/delete this email.
Want to know why, click on the link and it has cool Excel tips.
Excel Skills Builder—Learn how to create spreadsheets and workbooks, use formulas, and perform data analysis - Office.com:

'via Blog this'